Getting Started with Selenium GRID
This post covers very basics of selenium Grid,I will cover adavnced concepts of grid in upcoming posts.
Selenium-Grid allows you run your tests on different
machines against different browsers in parallel.it have 2 basic components
1.
HUB:
Hub is a key component in selenium grid, it
takes care of following things
·
It receives a test to be executed along with
information on which browser and ‘platform’ (i.e. WINDOWS, LINUX, etc.) where
the test should be run.
2.
NODE:
It is another component of
selenium grid, which can be used by the HUB to pass the tests to execute, A node supposed to be register to the grid with the settings like
browser, browser version,OS,OS version….etc.
Pre requisites:
·
Java
·
Eclipse with TestNG Plugin
INSTALLATION:
Install the latest
version of selenium server jar file from http://docs.seleniumhq.org/download/
Starting a HUB:
It is always a best practice a HUB first then Nodes, follow
the below steps to start a hub
1.
Open command prompt
2.
Go to the folder where your Selenium server.jar
file resides
3.
Run the following command :
4.
If your grid successfully started, then you
would be watching the following message in command prompt

You can verify your grid/Hub configuration by hitting the
following URL on any available browser:
Screenshot:

Starting NODE:
Ideally a HUB can be
one, but you can start more than node to register with the hub, But we have to
make sure that each node should use different ports, follow the below steps to
start the node
1.
Open command prompt
2.
Go to the folder where your Selenium server.jar
file resides
3.
Run the following command :
4.
If your Node successfully registered, then you
would be watching the following message in command prompt

You can verify
node registration by hitting the
following URL/refreshing the URL:
Expected Screenshot:

Creating Scripts:
To execute scripts with GRID, it is suggested that, write
your scripts using the TestNG framework, follow the below steps to create
sample scripts
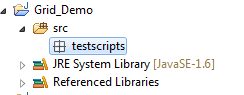
1.
Create a sample project in eclipse

2.
Add a package(testscripts) to src
3.
Create simple TestNG Test case with the below
code :
|
package testscripts;
import static org.junit.Assert.fail;
import java.net.URL;
import
java.util.concurrent.TimeUnit;
import
org.openqa.selenium.By;
import
org.openqa.selenium.Platform;
import
org.openqa.selenium.WebDriver;
import
org.openqa.selenium.remote.DesiredCapabilities;
import
org.openqa.selenium.remote.RemoteWebDriver;
import
org.testng.annotations.AfterTest;
import
org.testng.annotations.BeforeTest;
import
org.testng.annotations.Test;
public class NewTest4 {
private WebDriver driver;
private String baseUrl;
private StringBuffer verificationErrors = new StringBuffer();
@BeforeTest
public void setUp() throws Exception {
DesiredCapabilities capabilities
= new
DesiredCapabilities();
capabilities.setBrowserName("firefox");
capabilities.setPlatform(Platform.WINDOWS);
driver = new RemoteWebDriver(new URL("http://localhost:4444/wd/hub"),capabilities);
baseUrl = "http://way2automationtesting.blogspot.in/";
driver.manage().timeouts().implicitlyWait(30,
TimeUnit.SECONDS);
}
@Test
public void testNew1() throws Exception {
driver.get(baseUrl + "/");
driver.findElement(By.cssSelector("img")).click();
}
@AfterTest
public void tearDown() throws Exception {
driver.quit();
String verificationErrorString = verificationErrors.toString();
if (!"".equals(verificationErrorString))
{
fail(verificationErrorString);
}
}
}
|
4.
Make the copy of the same code with different
names such as NewTest2,NewTest3….etc

5.
Now create a Suite.XML in your project base path
with the following content:
|
<?xml version="1.0"
encoding="UTF-8"?>
<suite name="Test
Suite" verbose="1"
parallel="true" thread-count="2">
<test name="Test">
<packages>
<package name="testscripts"
/>
</packages>
</test>
</suite>
|
Executing Scripts:
1.
Right click on your Suite.XML file
2.
Select the options as highlighted in below
screen shot

Now, your scripts will be executed parallel on 3 Firefox
browsers.
No comments:
Post a Comment